


How to Clean and Maintain Your Tyvok Laser Engraver (Complete Guide 2026)
Your Tyvok laser engraver is a well-built machine that's designed to last for years with proper maintenance. But like any tool, it needs regular cleaning and preventive maintenance to keep it running at peak performance. A little maintenance goes a long way toward preventing problems and extending the life of your machine.
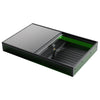
In this complete guide, we'll walk you through everything you need to know to clean and maintain your Tyvok laser engraver – whether it's the Tyvok A1 Mini gantry machine or the Tyvok P2 galvo laser. We'll cover what you need to do daily, weekly, monthly, and yearly to keep your machine in perfect working order.
Why Maintenance Matters
You might be wondering why regular maintenance is so important. Here's what happens when you don't keep up with cleaning and maintenance:
- Dirty lens reduces power – Smoke residue builds up on your laser lens, which reduces the power output and causes inconsistent engraving results.
- Debris can cause jams or inaccurate movement – Dust and debris build up on the rails and belts, which can cause your gantry to stick or move inaccurately.
- Poor ventilation leads to more smoke buildup – When your honeycomb platform gets clogged with debris, it doesn't ventilate as well, which leads to more smoke residue on your work and your machine.
-
Small problems become big problems – A loose belt or a worn part can cause bigger problems if you don't catch it early.
The good news is that maintaining your Tyvok laser doesn't take a lot of time or any expensive tools. Just a few simple tasks done on a regular schedule will keep your machine running great for years.
Basic Tools You'll Need
Before we get started, gather these basic tools for cleaning and maintenance. You probably already have most of them around the house:
- Isopropyl alcohol (91% or higher works best)
- Lens cleaning fluid (or pure isopropyl alcohol works fine)
- Microfiber cloths (lint-free)
- Cotton swabs
- Vacuum cleaner with a brush attachment
- Compressed air (the kind you use for cleaning keyboards works great)
- Hex keys (the ones that came with your machine)
- Food-grade lubricant or light machine oil (for rails if needed)
That's all you need. You don't need any special tools to maintain your Tyvok laser.
---
Daily Maintenance (5 Minutes or Less)
You don't need to do much after every use, but these quick tasks will keep your machine clean between deeper cleanings:
1. Wipe Down the Exterior
After you're done using the machine for the day, give the outside of the frame and the control box a quick wipe with a dry or slightly damp cloth to remove any dust or smoke residue. This doesn't take long, and it keeps your machine looking good.
2. Clean Any Visible Debris from the Work Area
If you've been cutting a lot of material, there might be small pieces of debris on the engraving platform or in the bottom of the machine. Give it a quick brush or vacuum to remove the big pieces.
3. Turn Off the Machine and Unplug if You're Done for the Day
It's just good practice to turn off the machine and unplug it when you're not using it. This prevents any accidental startup when you're not around, and it saves electricity.
That's it for daily maintenance. It only takes a couple of minutes, and it keeps your machine from getting too dirty between weekly cleanings.
---
Weekly Cleaning (15-20 Minutes)
Once a week, if you use your machine regularly, do these deeper cleaning tasks:
1. Clean the Laser Lens
This is the most important weekly task. Smoke residue from laser engraving builds up on the surface of your laser lens over time. This residue absorbs some of the laser energy, which reduces your power output and can cause inconsistent engraving.
How to clean your lens:
1. Turn off the machine and unplug it. Wait for the laser module to cool down completely.
Important tips:
- Don't use paper towels – they can scratch the lens. Always use a clean microfiber cloth.
- Don't press hard on the lens – you can crack it or scratch it.
- Clean your lens more often if you do a lot of cutting – cutting produces more smoke than engraving.
2. Vacuum Out the Engraving Platform and Bottom of the Machine
If you have a Tyvok engraving platform, the honeycomb cells catch a lot of debris from cutting and engraving. Every week, take the platform out of the machine and vacuum both the top and the bottom to remove all the ash and small pieces of debris.
This keeps the air flowing freely through the honeycomb, which improves ventilation and gives you cleaner engravings. When the cells get clogged with debris, ventilation gets worse, which means more smoke residue on your projects and more cleaning of your lens.
After you vacuum the platform, vacuum out the bottom of the machine frame to remove any debris that fell through the platform.
3. Check for Loose Screws and Nuts
Give all the visible screws a quick check to make sure none of them have come loose. Especially check the:
- Screws that hold the laser module in place
- Screws that hold the gantry carriages
- Screws that hold the control box to the frame
If you find any loose screws, just tighten them up gently. You don't need to over-tighten them – just snug is enough.
---
Monthly Maintenance (30-45 Minutes)
Once a month, do these more thorough maintenance tasks:
1. Deep Clean the Engraving Platform
Even with weekly vacuuming, some smoke residue builds up on the surface of your honeycomb platform. Once a month, give it a deeper clean:
1. Take the platform out of the machine.
This gets rid of the accumulated residue and keeps the air flowing freely. A clean Tyvok engraving platform not only gives you better ventilation, it also prevents unwanted discoloration on the bottom of your projects.
2. Clean and Inspect the Belts (For Gantry Machines Like the A1 Mini)
If you have a Tyvok A1 Mini with a moving gantry, the belts need a little maintenance once a month:
1. Inspect the belts for any signs of wear, fraying, or damage. If you see significant fraying or damage, it's time to replace the belt. 2. Wipe the belts down with a dry cloth to remove any dust and debris buildup. 3. Check the belt tension. It should be firm but not rock hard. If it's sagging or loose, it's time to retension it.
How to retension the belts:
- Loosen the adjustment screws on the tensioner
- Pull the belt until it has the correct tension
- Tighten the screws back down
- Check the tension again after tightening
If you're not sure what the correct tension feels like, check your manual – it should have guidance. But generally, you should be able to press the belt about 5-10mm with your finger before it gives.
3. Clean and Lubricate the Linear Rails (For A1 Mini)
The linear rails that the gantry moves along need to be kept clean and lightly lubricated for smooth movement:
1. Wipe the rails down with a clean dry cloth to remove any dust and old oil.
You don't need to lubricate very often – once a month is enough if you use your machine regularly. If you don't use it very often, once every couple of months is fine.
4. Check the Ventilation System
If you have a fan or fume extractor, check the filter once a month. If you have a disposable filter, replace it when it's dirty. If you have a washable filter, take it out and clean it according to the manufacturer's instructions.
A clean filter not only keeps the air you breathe clean, it also maintains good air flow through your machine, which reduces smoke buildup on your lens and projects.
5. Inspect the Wiring and Cables
Take a quick look at all the cables and wires to make sure none of them are frayed, damaged, or have loose connections. Pay special attention to the cable that goes to the laser module – it moves every time the gantry moves, so it can get worn over time.
If you see any damaged insulation or frayed wires, replace the cable before you use the machine again. This is a simple safety precaution that prevents electrical problems.
---
Yearly Maintenance (1-2 Hours)
Once a year, do these more thorough maintenance tasks to keep your machine running like new:
1. Deep Clean Everything
Take everything out of the machine – the engraving platform, any jigs or attachments, and give the entire inside of the frame a thorough cleaning. Vacuum out all the dust and debris, wipe down all the surfaces with a damp cloth, and let everything dry completely before you put it back together.
2. Replace Worn Parts
Yearly maintenance is a good time to replace any parts that are showing signs of wear before they fail:
- Belts – If your belts are starting to fray or they don't hold tension anymore, replace them. Belts are relatively inexpensive, and it's better to replace them before they break in the middle of a big job.
- Filters – Replace any filters in your ventilation system that need replacing.
-
Any other worn parts – If you've noticed that something isn't working as well as it used to, yearly maintenance is a good time to replace it.
3. Check and Recalibrate if Needed
If you've been using your machine for a year, it's a good idea to check the calibration:
- Check that the steps per mm are still correct. You can do a simple test – engrave or cut a square that's 100mm x 100mm, then measure it with calipers. If it's not exactly 100mm, you can adjust the steps per mm in your software.
- Check that the belt tension is still correct. Over time, belts can stretch a little bit, so you might need to retension them.
Most of the time, everything will still be in calibration, but it's good to check once a year to make sure.
---
Specific Maintenance for the Tyvok A1 Mini
The Tyvok A1 Mini is a gantry diode laser, so it needs all the maintenance we've talked about above:
- Clean the lens weekly
- Vacuum the engraving platform weekly
- Check belt tension monthly
- Clean and lubricate the linear rails monthly
- Deep clean everything yearly
The A1 Mini is actually very low maintenance compared to bigger machines. The solid aluminum frame holds up really well, and there just aren't that many moving parts that need a lot of attention. Most users go years without any major issues as long as they keep up with the basic maintenance.
---
Specific Maintenance for the Tyvok P2 Galvo Laser
The Tyvok P2 galvo laser has a different design than the A1 Mini, so its maintenance needs are a little different:
What's Different:
1. No moving gantry, no belts, no rails – Since there's no moving gantry, you don't need to worry about belt tension or lubricating rails. That means less maintenance overall.
2. The galvo mirrors are delicate – Never touch the galvo mirrors with your fingers or any cloth. If they get dust on them, you can gently blow them off with compressed air. If they get smoke residue on them, you need to be very careful – use a lens cleaning cloth with a tiny drop of cleaning fluid, and don't press hard. If you're not comfortable doing it yourself, most people just leave them alone unless there's a noticeable problem.
3. The laser lens still needs regular cleaning – Just like with the A1 Mini, you need to clean the output lens of the laser module regularly. Smoke residue builds up here just like it does on any laser, so clean it weekly just like you would on the A1 Mini.
4. Clean the honeycomb platform regularly – Even though it's a galvo, you still need to keep your Tyvok engraving platform clean for good ventilation. The weekly vacuuming still applies.
So the P2 actually requires less maintenance than the A1 Mini because there are fewer moving parts. Just keep the lens clean and the platform clean, and it will last for years.
---
Common Signs That Your Machine Needs Maintenance
How do you know when it's time for maintenance, even if it's not quite on your schedule? Watch for these common signs:
1. Your Engravings Are Fainter Than Usual
If you're using the same power and speed settings you always use, but your engravings are coming out fainter than normal, the first thing to check is your lens. It's probably covered with smoke residue and needs cleaning. 9 times out of 10, cleaning the lens fixes this problem.
2. Your Cuts Aren't Going All the Way Through
Again, the first thing to check is a dirty lens reducing power. If cleaning the lens doesn't fix it, check that your focus is correct – maybe your material isn't flat, or the laser module has slipped out of focus.
3. Movement Is Choppy or Inaccurate (For A1 Mini)
If the gantry isn't moving smoothly, or your engravings are coming out with inaccurate dimensions, check:
- Are the belts properly tensioned?
- Are the rails clean and properly lubricated?
- Are any screws loose?
Most of the time, this is just a belt tension or lubrication issue, which is easy to fix.
4. You Notice More Smoke Buildup on Your Projects
If your projects are coming out with more soot than usual, that usually means your ventilation isn't working as well as it should. Check:
- Is your honeycomb platform clogged with debris? Clean it out.
- Is your fume extractor filter dirty? Replace or clean it.
- Is your fan working properly?
Better ventilation means cleaner projects and less cleaning of your lens.
---
Tips for Extending the Life of Your Tyvok Laser
Here are some extra tips to help your machine last as long as possible:
1. Don't Run the Laser Beyond Its Rated Duty Cycle
Your laser module has a duty cycle – that means it shouldn't be on continuously forever without cooling down. For the 10W modules in the A1 Mini and P2, it's fine for most normal jobs, but if you're doing extremely long cuts, let the laser module cool down for 10-15 minutes every hour or so. This prevents overheating that can shorten the life of the laser diode.
2. Always Focus Correctly
If your laser isn't in focus, all the energy doesn't get concentrated on the surface of your material. Some of the energy gets spread out, which means you have to use more power to get the same result, and that can shorten the life of your laser. Get in the habit of checking the focus every time you change material thickness.
3. Use a Quality Honeycomb Platform
A good Tyvok engraving platform not only gives you better results, it also improves safety by preventing back reflection and back burning. This reduces the amount of extra heat buildup in your machine, which helps everything last longer.
4. Don't Force Anything
If something isn't moving smoothly or fitting correctly, don't force it. Stop and figure out what's wrong. Forcing something can break it, and that could have been avoided with a little troubleshooting.
5. Keep Your Machine in a Dry, Temperature-Stable Environment
Don't put your machine somewhere that gets really humid or really hot. Extreme temperatures and humidity can damage the electronics and cause aluminum to corrode over time. A normal room temperature and humidity is perfect.
---
Troubleshooting Common Maintenance Issues
Q: My lens still looks foggy after cleaning. What should I do?
A: Try cleaning it again with fresh alcohol and a clean microfiber cloth. Sometimes the first cloth doesn't get all the residue off. If it's still foggy after a couple of cleanings, the lens might have a permanent coating of residue, and it's time to replace it. Replacement lenses aren't expensive, and it's better to replace it than work with a dirty lens that reduces your power.
Q: My belts keep getting loose. What's wrong?
A: After the machine has been used for a while, new belts can stretch a little bit initially. Just retension them, and after they've stretched to their final length, they'll stay tensioned. If they keep stretching after several retensionings, that means the belts are worn out and it's time to replace them. Belts are inexpensive, so don't be afraid to replace them when they're worn.
Q: How often do I need to replace the laser diode?
A: With normal use, the laser diode in your Tyvok A1 Mini or Tyvok P2 should last 10,000 hours or more. That's several years of regular use for most hobbyists and small businesses. When it does start to lose power significantly, you can just replace the laser module – you don't need to replace the whole machine.
Final Thoughts
Regular cleaning and maintenance doesn't take a lot of time, but it makes a big difference in how well your machine performs and how long it lasts. A little effort every week, month, and year will keep your Tyvok laser running like new for years.
The most important things are:
- Keep your laser lens clean – this affects every project you do
- Keep your engraving platform clean for good ventilation
- Check belts and lubricate rails regularly on the A1 Mini
- Do a deep clean once in a while to prevent buildup of debris
Whether you have a Tyvok A1 Mini for getting started, a Tyvok P2 for fast galvo engraving, or both, following this simple maintenance schedule will help you get the most out of your investment.
---
Just setting up your new Tyvok A1 Mini? Check out our [complete step-by-step setup guide](How-to-Set-Up-Your-Tyvok-A1-Mini-for-First-Time-2026.md) and make sure you have the right [Tyvok engraving platform](Why-Every-Laser-Engraver-Needs-a-Quality-Tyvok-Engraving-Platform.md) to go with it.
Related Reading: How To Clean And Maintain Your Tyvok Laser Engraver Complete Guide 2026
Related Reading: How to Clean and Maintain Your Tyvok Laser Engraver: Complete Guide 2026
Related Reading: Beginners Guide To Laser Safety What You Need To Know Before Using Your Tyvok Laser


