


If you’re a DIY enthusiast who loves crafting intricate designs on wood, metal, glass, or plastic, you know the frustration of tools that can’t keep up with your creativity. Blurry lines, uneven pressure, and missed details can turn a promising project into a disappointing mess. But what if there was a tool that combined professional-grade precision with the ease of use every hobbyist needs? Enter the electric engraving pen with 0.01mm accuracy—a game-changer for anyone who wants to transform raw materials into masterpieces, no matter their skill level.

What Does "0.01mm Accuracy" Mean for Your Projects?
Let’s start with the numbers: 0.01mm is 1/100th of a millimeter—thinner than a human hair (which averages 50–100 microns, or 0.05–0.1mm). This level of precision empowers you to:
- Engrave micro-text (think tiny quotes on a pendant) without smudging or bleeding.
- Etch ultrafine lines (like delicate leaf veins on a wooden plaque) with consistent depth and crispness.
- Add minuscule details (such as star constellations on a glass vase) that traditional tools would never capture.
This isn’t just about “finishing the job”—it’s about bringing your vision to life with clarity, whether you’re a beginner carving your first wooden sign or a seasoned maker crafting custom jewelry.
The Technology Behind the Precision: 3 Key Features
1. Brushless Motor for Stable, Consistent Power
Most budget engraving pens use brushed motors, which lose speed over time and create vibrations that ruin precision. Top-tier models for DIYers rely on brushless motors, which:
- Maintain steady RPM (20,000–30,000 RPM) for uniform carving depth, even on tough materials like stainless steel.
- Reduce vibration by 60% thanks to magnetic levitation technology (no physical contact between moving parts), ensuring smoother, more controlled strokes.
- Last 3–5 times longer than brushed motors, so you won’t face mid-project breakdowns.
Example: The Brand Craft Pro Pen uses a brushless motor to etch a 0.01mm-deep line on stainless steel without skipping—a feat impossible for most budget models.
2. Premium Carbide Tips for Razor-Sharp Control
The tip is the heart of any engraving pen. Look for carbide or diamond-tipped bits, which:
- Stay sharp 10x longer than steel tips, making them ideal for aluminum, ceramic, and other hard materials.
- Offer 0.01mm point precision, letting you switch effortlessly between ultra-fine detailing and bold, broad strokes with a simple tip swap.
- Fit universal quick-release systems, so you can change tips in seconds—no tools required (a must for DIYers who hate fussy setups).
Pro Tip: Start with a 0.5mm pointed tip for intricate work and a 2mm flat tip for filling larger areas. Most pens come with 3–5 tip shapes (pointed, round, flat) to cover all project types.
3. Ergonomic Design for All-Day Comfort
DIY projects often demand hours of focused work. A great engraving pen should feel like an extension of your hand, not a bulky power tool:
- Lightweight build (under 200g) minimizes wrist strain during marathon crafting sessions.
- Rubberized, non-slip grip is designed for all hand sizes, so you won’t lose control or get blisters.
- Adjustable speed dial (1,000–30,000 RPM) lets you tailor power to your material—gentle for soft wood, aggressive for hard metal.
User Review: “My old pen gave me hand cramps after 30 minutes. This one let me carve a 6-hour custom sign without stopping—my wrist is obsessed!” – Sarah, DIY Jewelry Maker
Real-World Applications: Crafting with Confidence
Project: Custom Wood Sign with Acrylic Inlays
Tools Needed:
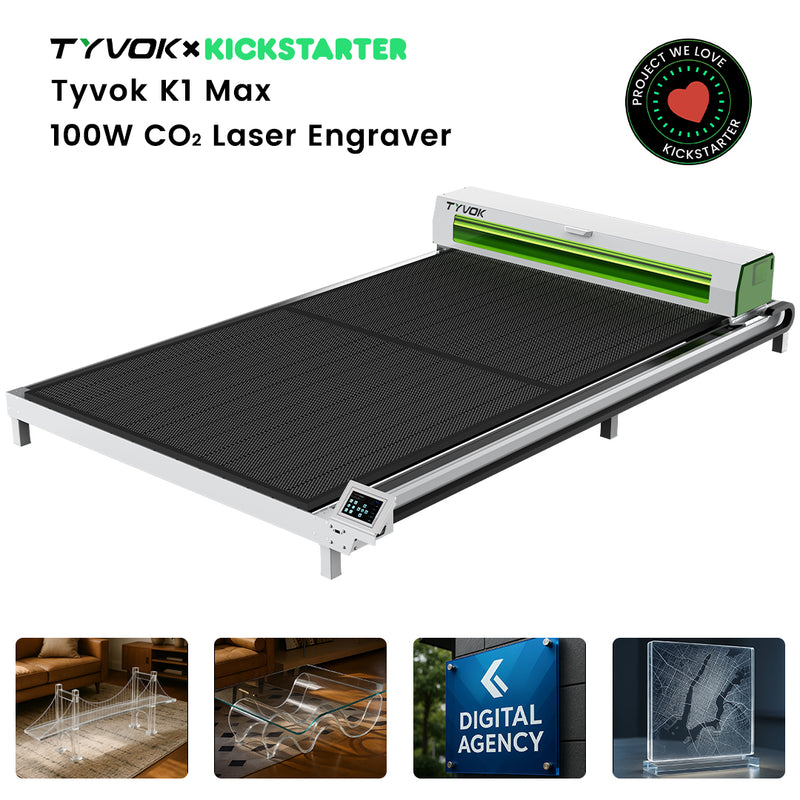
- Tyvok S1 Large Format Laser Engraver (for cutting wood and acrylic)
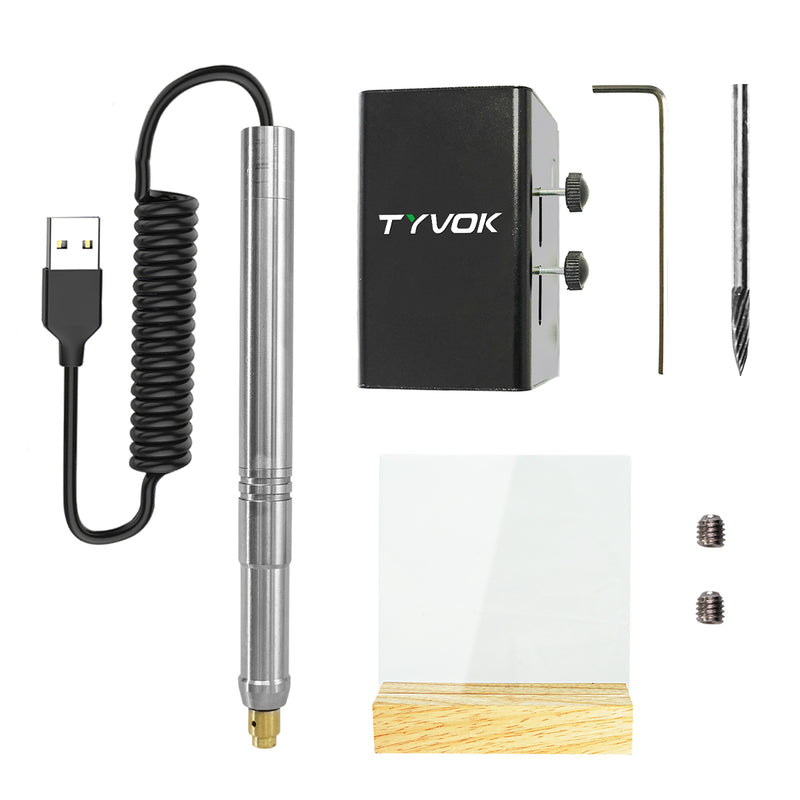
- Tyvok Engraving Pen (for detailed groove carving and finishing)
- 0.3mm pointed tungsten carbide tip (for fine lines), 2mm flat tip (for groove widening)
- Wood glue, colored acrylic sheets (3–5mm thick), sandpaper (240 and 800 grit)
The compact engraving pen has a lightweight body for performing delicate personalization on DIY projects. The electric pen features a 20,000 RPM motor to engrave glass, metal, ceramic, and plastic, powered by a built in USB cable. It can also be used as a practical wood engraver or part of your metal engraving kit.

Step 1: Design & Material Prep with Tyvok S1
- Digital Design: Use LightBurn software to create your pattern (e.g., floral borders + text), ensuring inlay grooves are at least 0.5mm wide for tip compatibility.
-
Cutting Materials:
- Wood: Set the Tyvok S1 to 60W and 150mm/min to cut a 30x20cm pine/birch base (10–15mm thick). Sand edges smooth with 800-grit paper.
- Acrylic: Switch to 30W and 300mm/min to cut colorful acrylic sheets (slightly smaller than grooves to prevent swelling).
Tyvok Advantage: The S1’s 1500x2500mm workspace lets you cut multiple boards and acrylics at once, boosting batch efficiency by 50%.

Step 2: Carve Inlay Grooves with Tyvok Engraving Pen
- Positioning: Temporarily tape acrylic sheets to the wood and use the 0.3mm tip to score 0.01mm-deep guide lines—no penetration, just precision marking.
-
Layered Groove Carving:
- First pass (outline): Set to 5000 RPM and carve 0.5mm-deep outlines to avoid edge chipping.
- Second pass (widening): Swap to the 2mm flat tip, 8000 RPM, and fill grooves to 2–3mm depth using a zigzag pattern for a snug acrylic fit.
- Curved surfaces: The pen’s 180g weight and anti-vibration tech let you glide smoothly over jewelry box edges or rounded signs.
Step 3: Inlay & Finishing Touches
- Embed Acrylic: Apply a thin layer of wood glue (≤0.1mm) in grooves, press in acrylic sheets, and weight them for 24 hours. Sand flush with 800-grit paper for a seamless finish.
-
Detail Work:
- Acrylic texture: Use the 0.5mm tip at 10,000 RPM to etch a matte finish on acrylic for contrast.
- Wood accents: Add 0.2mm-deep leaf veins or patterns in blank areas with the 0.3mm tip for extra flair.
Step 4: Protect & Polish
- Seal wood with wax oil to preserve grain, and wipe acrylic with a soft cloth (avoid solvents).
- Check grooves with a flashlight—Tyvok’s 0.01mm accuracy ensures no gaps or “white edges,” a common flaw in cheaper tools.
How to Choose Your Perfect Engraving Pen: A DIYer’s Checklist
| Feature | Why It Matters |
|---|---|
| Accuracy | ≤0.01mm for micro-detailing; ≤0.1mm for basics. |
| Motor Type | Brushless > Brushed for stability and longevity. |
| Weight & Grip | Under 200g with rubberized grip for comfort. |
| Accessories | Includes multiple tips, stencils, and a case. |
| Price | $50–$150 for hobbyist models; $150+ for pro-grade. |
Final Verdict: Is 0.01mm Accuracy Worth It?
Absolutely—if you’re tired of tools that limit your creativity. A high-precision electric engraving pen isn’t just a tool; it’s a gateway to crafting with confidence. Whether you’re personalizing gifts, building an Etsy shop, or simply enjoying the meditative flow of DIY, the right pen turns “good enough” into “I can’t believe I made this.”
💡 Tip: Looking for the best value galvo laser for metal marking? The Tyvok P2 2W Galvo Laser is our top pick for 2026 — currently 50% OFF at just $149!


