


Direct Answer

A laser engraver for packaging inserts makes sense when a small business wants branded cards, wood inserts, product tags, display cards, gift box pieces, or repeatable flat packaging parts. TYVOK X1S and X1S Pro are stronger candidates when the insert layout is larger, repeated, or arranged in batches. TYVOK P2 is better when the insert is compact, highly personalized, and does not need a large work area.
The buying decision should start with the packaging system: insert size, material, quantity, readability, brand look, packing speed, and whether the finished insert improves conversion or repeat purchase.
Key Takeaways
| Buyer question | Better answer | Why it matters |
|---|---|---|
| I need small personalized cards | P2 may be enough | Compact inserts do not require large format |
| I need many flat inserts in one layout | Compare X1S / X1S Pro | Larger area helps batch planning |
| I need premium packaging photos | Show finished packaging first | Buyers need to see the result |
| I need repeatable production | Test the full workflow | Output includes setup, inspection, packing |
| I use coated or unknown material | Verify safety first | Some coatings and plastics are unsafe |
Why Packaging Inserts Matter for Small Businesses
Packaging inserts connect the laser engraver to a real business outcome. The buyer is not only asking, "Can this machine engrave?" The buyer is asking, "Can this help my product look more premium and sell better?"
For small businesses, inserts can support:
- Brand cards.
- Thank-you cards.
- Product care cards.
- Gift box pieces.
- Wood or paperboard display inserts.
- Product tags.
- QR or reorder cards.
- Event or retail shelf labels.
This is stronger than generic machine specs because it explains the actual product workflow.
When P2 Is the Better Fit
TYVOK P2 is still the better direction when the packaging insert is small, personalized, and fast to set up. If the business sells compact gifts, event items, small tags, cards, or one-off personalization, a compact galvo workflow may be easier than a large-format setup.
P2 is a better fit when:
- The insert is small and easy to position.
- Each item has a name, date, logo, or short personalized message.
- You need fast sample loops.
- Your product photos focus on small premium details.
- You do not need to arrange many inserts in one large layout.
This matters because a larger machine does not automatically make better packaging. If the insert is compact, speed of setup and finished detail may matter more than area.
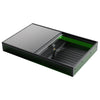
When X1S Makes Sense
TYVOK X1S makes sense when packaging inserts become a layout problem. If the seller wants to arrange many flat cards, wood inserts, tags, or display pieces in one workflow, a larger work area can help.
X1S is a better fit when:
- You need more layout room than compact personalization allows.
- You want to batch several packaging inserts together.
- You are testing branded cards, tags, labels, or box pieces.
- You need a growth path from one-at-a-time work into planned batches.
- You still want a manageable small-shop setup.
Confirm the selected bundle, platform option, current laser module, and material handling before ordering.
When X1S Pro Makes Sense
TYVOK X1S Pro is the stronger shortlist when packaging inserts are part of a more serious production workflow. It is more relevant when you already know your product line, insert sizes, material source, and batch layout.
X1S Pro is a better fit when:
- You want larger or repeated insert layouts.
- You need to compare Pro configurations and accessories.
- You want to plan shop production instead of only samples.
- You have consistent insert materials and artwork.
- You can test, inspect, finish, and pack repeatably.
Do not choose X1S Pro only because it sounds more powerful. Choose it when packaging volume, layout, and shop process justify the workflow. Confirm current power option, platform board, accessory needs, and software workflow on the live product page before ordering.
X1S / X1S Pro Specs to Confirm
| Item | X1S direction | X1S Pro direction | What to confirm |
|---|---|---|---|
| Workflow role | Larger layout growth path | More planned large-format workflow | Current product page and selected bundle |
| Work area | Standard or expanded setup depending on bundle | Large-format workflow depending on configuration | Whether your insert layout fits |
| Platform | Platform option may matter for flat insert batches | Platform board can matter for repeated layouts | Current platform and accessory options |
| Software | Confirm supported software on the current product page | Confirm supported software on the current product page | Your file workflow and license needs |
| Best use | Testing larger packaging layouts | More serious repeated insert production | Material, fixture, inspection, packing process |
Packaging Insert Ideas to Test

| Insert type | Good use case | What to verify |
|---|---|---|
| Thank-you card | DTC packaging and repeat purchase | Readability, material, packing speed |
| Product care card | Leather, wood, handmade products | Text size and contrast |
| Wood insert | Premium gift box or product tray | Finish, thickness, cleanup |
| Brand tag | Apparel, accessories, handmade goods | Hole placement, logo clarity |
| QR reorder card | Consumables or repeat products | Scan readability and placement |
| Retail display card | Store shelves or craft booths | Distance readability and scale |
Start with one insert type. A simple product care card or thank-you insert is often easier to validate than a complex custom box component.
Material Safety and Packaging Reality
Packaging materials can be tricky because many are coated, laminated, printed, adhesive-backed, or made from composite paper/plastic layers. Do not laser process unknown plastics, PVC, vinyl, PVC leather, unknown faux leather, unknown coated stock, unknown glue layers, or materials without clear safety information.
Safer testing starts with known paperboard, wood, genuine leather, or supplier-confirmed laser-safe materials. Even then, test smoke, residue, contrast, smell, and cleanup before selling. Packaging touches the customer experience directly, so dirty edges, strong odor, or inconsistent marks can damage the brand.
If the packaging may touch food, cosmetics, children's products, pet products, skin-contact items, or anything regulated, confirm material composition, coatings, smoke residue, cleaning requirements, and applicable rules before using laser-marked inserts. Do not assume a good-looking sample is automatically appropriate for every product category.
Do not assume packaging shapes can be cut reliably across materials. Cutting depends on material thickness, coating, glue, power option, air assist, settings, passes, and finish expectations. Engraving a logo on a packaging insert is not the same as cutting full packaging shapes.
Batch Workflow for Packaging Inserts
A packaging insert workflow should be tested as a system:
- Choose one insert size.
- Choose one material source.
- Create a fixed layout file.
- Decide how blanks will be positioned.
- Run a small batch.
- Inspect every piece for contrast and residue.
- Pack the inserts with real products.
- Photograph the final unboxing experience.
Do not measure only laser time. Packaging work includes layout, loading, inspection, cleanup, packing, and handling mistakes.
What Good Packaging Photos Should Show

For conversion, packaging content should show the result before the process.
Useful image set:
- Finished product box with insert visible.
- Close-up of engraved or marked text.
- Batch layout of inserts before packing.
- Final unboxing scene.
- Scale photo showing insert size.
The first image should answer the buyer's question: "Will this make my product look more premium?" The machine can appear later, but the finished packaging should lead.
P2 vs X1S vs X1S Pro for Packaging Inserts
| Workflow need | P2 | X1S | X1S Pro |
|---|---|---|---|
| Small personalized card or tag | Strong fit | More area than needed | More setup than needed |
| Many flat inserts in one layout | Limited fit | Stronger fit | Stronger Pro path |
| Larger box pieces or display cards | Limited fit | Strong fit | Stronger for planned workflows |
| Fast sample testing | Strong fit | Good for larger samples | Better when workflow is proven |
| Shop batch planning | Compact only | Growth path | More serious shortlist |
If the product is small and personalized, P2 may convert better. If the product is larger, repeated, or layout-heavy, compare X1S and X1S Pro.
Recommended TYVOK Path
| Situation | Recommended path |
|---|---|
| Small gift tags and compact cards | TYVOK P2 |
| Larger flat inserts and display cards | TYVOK X1S |
| Repeated packaging insert batches | TYVOK X1S / X1S Pro |
| More planned shop production | Shortlist TYVOK X1S Pro |
| Unknown material or coating | Do not process until verified |
Related guides:
- Batch Engraving Machine for Small Business
- Large Format Laser Engraver Buying Guide: X1S vs X1S Pro
- Laser Engraver for Large Wood Signs
- TYVOK X1S Laser Engraver Cutter
- TYVOK X1S Pro Large Format Laser Engraver
- TYVOK P2 Galvo Laser Engraver
FAQ
Q: What laser engraver is best for packaging inserts?
A: Choose based on insert size, material, layout, and production workflow. P2 is better for compact personalized inserts, while X1S and X1S Pro are stronger candidates for larger or repeated flat layouts.
Q: Can X1S engrave packaging inserts?
A: X1S can be a good fit when the selected material is laser-safe and the layout needs more area than compact personalization. Confirm the bundle, platform, and material first.
Q: When should I choose X1S Pro for packaging?
A: Choose X1S Pro when you already have a planned insert product line, repeated layouts, consistent materials, and a shop workflow that benefits from a larger-format setup.
Q: Is P2 enough for thank-you cards and tags?
A: P2 may be enough when the cards or tags are compact, personalized, and easy to position. Large format is not required for every packaging insert.
Q: What packaging materials should I avoid?
A: Avoid PVC, vinyl, unknown plastics, unknown coated materials, and adhesive-backed or laminated stock without clear safety information.
Q: Can I cut packaging shapes with X1S or X1S Pro?
A: Cutting depends on material, thickness, coating, glue, air assist, settings, and passes. Test the exact material and avoid broad cutting promises.
Q: How many packaging inserts can I engrave at once?
A: It depends on insert size, spacing, fixture method, artwork, material behavior, and selected machine configuration. Test a small layout first.
Q: Do packaging inserts help small business sales?
A: They can improve perceived value, brand memory, care instructions, and reorder behavior when the insert looks premium and supports the product experience.
Q: What should a packaging insert page show first?
A: Show the finished packaging or unboxing result first. The buyer needs to see how the insert improves the product.
Q: What is the biggest mistake with packaging inserts?
A: Treating packaging as only a laser job. The real workflow includes material sourcing, layout, engraving, cleanup, packing, and customer presentation.
Conclusion
Packaging inserts are one of the clearest ways to connect laser engraving with small business value. X1S and X1S Pro make sense when larger layouts or repeated batches are the constraint. P2 remains better for compact personalized cards and tags. The best buying decision starts with the insert, material, brand experience, and repeatable packing workflow.


